
Apple
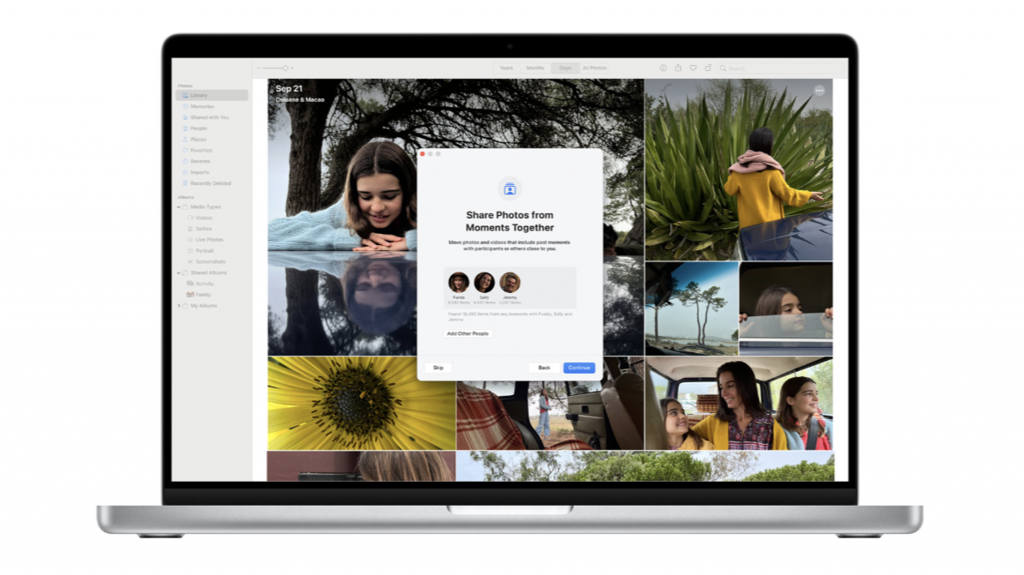
To create a Shared Library, on iPhone or iPad, go to Settings > [Your Name] > iCloud > Photos. Tap “Shared Library” and “Get Started.” On Mac, launch the Photos app and select Photos > Settings > Shared Library > Get Started. You can now choose participants and decide what photos and videos to share.
It’s easier than ever before for Apple users to share photos and videos with close friends and family through the iCloud Shared Photo Library. Here’s what you need to know about setting up and using the feature.
What Is the iCloud Shared Photo Library?
iCloud Shared Photo Library is a shared media library in which members can contribute to and access the contents. The Shared Library is used in conjunction with your personal library, and you can switch back and forth between them at will.
Just like your own personal library, an iCloud Shared Photo Library can be used to share all manner of media, including videos, Live Photos, RAW images, and anything else supported by the Photos app. You can make edits, delete or duplicate media, add captions, and more.
You can create or join an iCloud Shared Photo Library with members of a Family Sharing plan or five other users outside your family plan. To use iCloud Shared Photo Library on a Mac, you’ll need macOS 13 Ventura. On an iPhone or iPad, you’ll need to be running iOS 16.1 or iPadOS 16.1.
How to Set Up Your Own iCloud Shared Photo Library
When you set up a Shared Library, you assume the position of the organizer. You can do this on an iPhone, iPad, or Mac, provided you have updated your device to iOS/iPadOS 16.1 or macOS Ventura. You’ll also need iCloud Photo Library turned on.
Set Up on iPhone and iPad
On an iPhone or iPad, head to Settings, then tap on your name. Next, select iCloud > Photos. Scroll down until you see the “Shared Library” button and tap on it.
Hit “Get Started,” and you’ll then be asked to add some participants to your Shared Library (you can tap “Add Later” to delay this).
Next, choose whether you want to move some items from your personal library to the Shared Library. You can choose to add all of your photos and videos, photos tagged with specific people, or specific items (tap “Move Photos Later” to do it later).
Lastly, decide whether to “Share Automatically” from your iPhone or iPad camera or “Share Manually Only” to closely curate the experience.
Set Up on a Mac
To do this on a Mac, launch the Photos app, then click on Photos > Settings at the top of the screen. Click on the “Shared Library” tab, then use “Get Started” to create your library.
You can now add participants to your library using the “Add Participants” button, or click “Add Later” to do it later.
Next, choose whether you want to move all your photos and videos or a specific selection of your media to the Shared Library. Alternatively, select “Move Photos Later” to do it later.
Your iCloud Shared Photo Library is now ready to use!
How to Join Someone Else’s iCloud Shared Photo Library
The only way to join an iCloud Shared Photo Library that someone else has set up is to ask them to invite you using the instructions above. Once you receive the invitation, tap on it (or click it on a Mac), then follow the instructions to complete the process. You can only be a part of one Shared Library at a time.
Invitations are delivered by message. You’ll also find pending invitations under Settings > [Your Name] > iCloud > Photos > Shared Library on an iPhone or iPad, or in the macOS Photos app under Photos > Settings > Shared Library.
Switching Between Shared and Personal Libraries
Once you’ve created or joined a Shared Library, you can switch between viewing your personal or shared libraries using a toggle.
You can do this on an iPhone or iPad by tapping the ellipsis button at the top of the screen in the Photos app, then choosing from Both Libraries, Personal Library, or Shared Library.
On a Mac, there’s a dedicated drop-down button in the top toolbar that allows you to choose between personal, shared, and both.
A Few Things to Remember About Shared Libraries
You can only belong to one Shared Library at a time, including the one you have created yourself. Individuals aged 13 or under can only belong to a Shared Library within a Family Sharing plan.
Only the organizer (owner) of a library can invite new people to the library. On an iPhone or iPad, tap Settings followed by your name, then iCloud > Photos to see controls for adding participants. On a Mac, click Photos > Settings > Shared Library and add participants from there.
Once added, anyone can contribute to the Shared Library and make changes to the photos and videos inside.
How to Add Media to an iCloud Shared Photo Library
To manually add iPhone or iPad items to a Shared Library, tap “Select” on the Library tab, then choose the items you want to move. Tap the ellipsis “…” icon followed by “Move to Shared Library” to complete the move.
On a Mac, you can simply select items, then right-click and choose “Move Items to Shared Library” from the context menu.
Note: When you move an item, it is moved not copied. This means an item will no longer exist in your personal library but only in the Shared Library.
On an iPhone or iPad, you’ll see a badge next to an item that looks like two people side by side (Shared) or a single person (Personal). Tap on this icon to move individual photos and videos between your libraries. This icon isn’t visible on a Mac.
On your iPhone or iPad, head to Settings > Photos > Shared Library to see Camera controls for sharing automatically to your Shared Library. This allows you to automatically share photos and videos using the button in the top-left corner of the iPhone or iPad camera.
Enable “Share Automatically” to share photos over Bluetooth when it detects that you are with people who are contributing to the same Shared Library. You can also choose to always add photos and videos to your Shared Library when your iPhone detects you are at home with the “Share When At Home” toggle.
Shared Library Uses iCloud Storage
iCloud Shared Photo Library uses the organizer’s iCloud storage. If you’re already using a Family Sharing plan, having a Shared Library won’t take up any more space since all members of your plan are already using the organizer’s space.
Things get a little more complex if you invite people outside your Family Sharing plan. Media shared from those outside your plan will eat into your iCloud storage space. You’ll need to ensure you have enough storage (possibly by upgrading to the next iCloud tier) to accommodate a growing library.
Remember that these shared libraries will only get bigger as time goes on. You can delete items from your library (as can any participant) and merge duplicates. But the nature of a media library is that it grows over time.
If you’re contributing to an iCloud Shared Photo Library outside of your Family Sharing plan, try and be mindful of what you share (especially when it comes to videos or ProRAW photos).
Leave or Delete an iCloud Shared Photo Library
Leaving or deleting an iCloud Shared Photo Library is an almost identical process. If you’re the organizer, you’ll be able to delete a library, while participants can choose to leave instead.
On an iPhone or iPad, tap Settings followed by your name, then iCloud > Photos. On a Mac, launch Photos and click Photos > Settings > Shared Library. Here, you’ll find the option to leave the Shared Library or delete it.
When you click on this button, you’ll be asked whether you want to keep everything or only keep items that you contributed. You can confirm your intention to delete or leave, and selected items will be retained.
Organizers should notify participants of their intention to delete the Shared Library so they can make this choice for themselves. Otherwise, different rules apply when the library is deleted.
If a participant has been in the library for more than seven days, everything is transferred to their personal library. If they’ve been a member for less than seven days, only their personal contributions are transferred. The same rules apply if you remove a participant.
Access an iCloud Shared Photo Library on the Web
Just like your standard iCloud Photo Library, you can access your Shared Library on the web at iCloud.com. The interface closely resembles the Mac experience, complete with a dedicated drop-down at the top of the screen to switch between libraries wherever you are.
A Useful Way to Share Photos
iCloud Shared Photo Library takes the sting out of sharing photos with your nearest and dearest, assuming you set it up in a way that facilitates sharing.
Rather than asking or being asked to “send those photos you took yesterday” they’ll (hopefully) already be in your Shared Library, for others to browse, edit, and use elsewhere.
Just be mindful that anyone can add, modify, and delete items. You can also share photos using iCloud Shared Albums in a more controlled and less-open manner. Fingers crossed that the arrival of shared media collections will spur Apple to add larger storage tiers at lower per-gigabyte prices.
Source by www.howtogeek.com